There is nothing quite like the feeling of unboxing your new GolfSignet custom stamp. Whether it’s a monogram, a funny icon, or your company logo, holding that personalized tool signifies the end of marking your Titleists with a messy Sharpie line. You are ready to elevate your game—or at least, the look of your gear.
However, stamping a spherical, dimpled object like a golf ball is not the same as stamping a flat piece of paper. It requires a specific technique to ensure the ink transfers crisply into the dimples and across the curve without smudging.
If you’ve just received your stamp and are wondering how to use a golf ball stamp like a pro, you’re in the right place. This guide will walk you through the preparation, the "rocking" technique, and maintenance tips to keep your impressions looking sharp round after round.
Why Customizing Your Golf Ball Matters
Before we dive into the mechanics, let's briefly touch on why DIY golf ball customization is more than just an aesthetic choice.
-
Identification: In a foursome where everyone is playing a Pro V1, a unique stamp eliminates the "Is this my ball?" confusion in the rough.
-
Theft Deterrent: A clearly marked ball with a personalized logo is less likely to be "accidentally" picked up by a player on the adjacent fairway.
-
Confidence: Looking down at a ball stamped with a symbol that brings you joy or focus can provide that subtle mental edge needed before a tee shot.
Step-by-Step Guide: Mastering the Imprint
Achieving a factory-quality print at home is easy, but it requires attention to detail. Follow these steps to ensure your GolfSignet stamp delivers perfect results every time.
Step 1: Clean the Ball Surface
The most common mistake golfers make is stamping a ball straight out of the sleeve or, worse, straight out of the bag after a few holes.
-
Remove Factory Oils: New golf balls often have a thin layer of release agent or gloss coating from the manufacturing process.
-
Remove Debris: Used balls carry oils from your hands, grass stains, and dirt.
The Fix: Before stamping, wipe the area you intend to stamp with a clean cloth. For the absolute best results, use a small amount of rubbing alcohol or an alcohol prep pad. This strips away surface oils and ensures the ink bonds directly to the cover of the ball (typically Surlyn or Urethane), dramatically increasing the longevity of the mark. Ensure the ball is completely dry before proceeding.

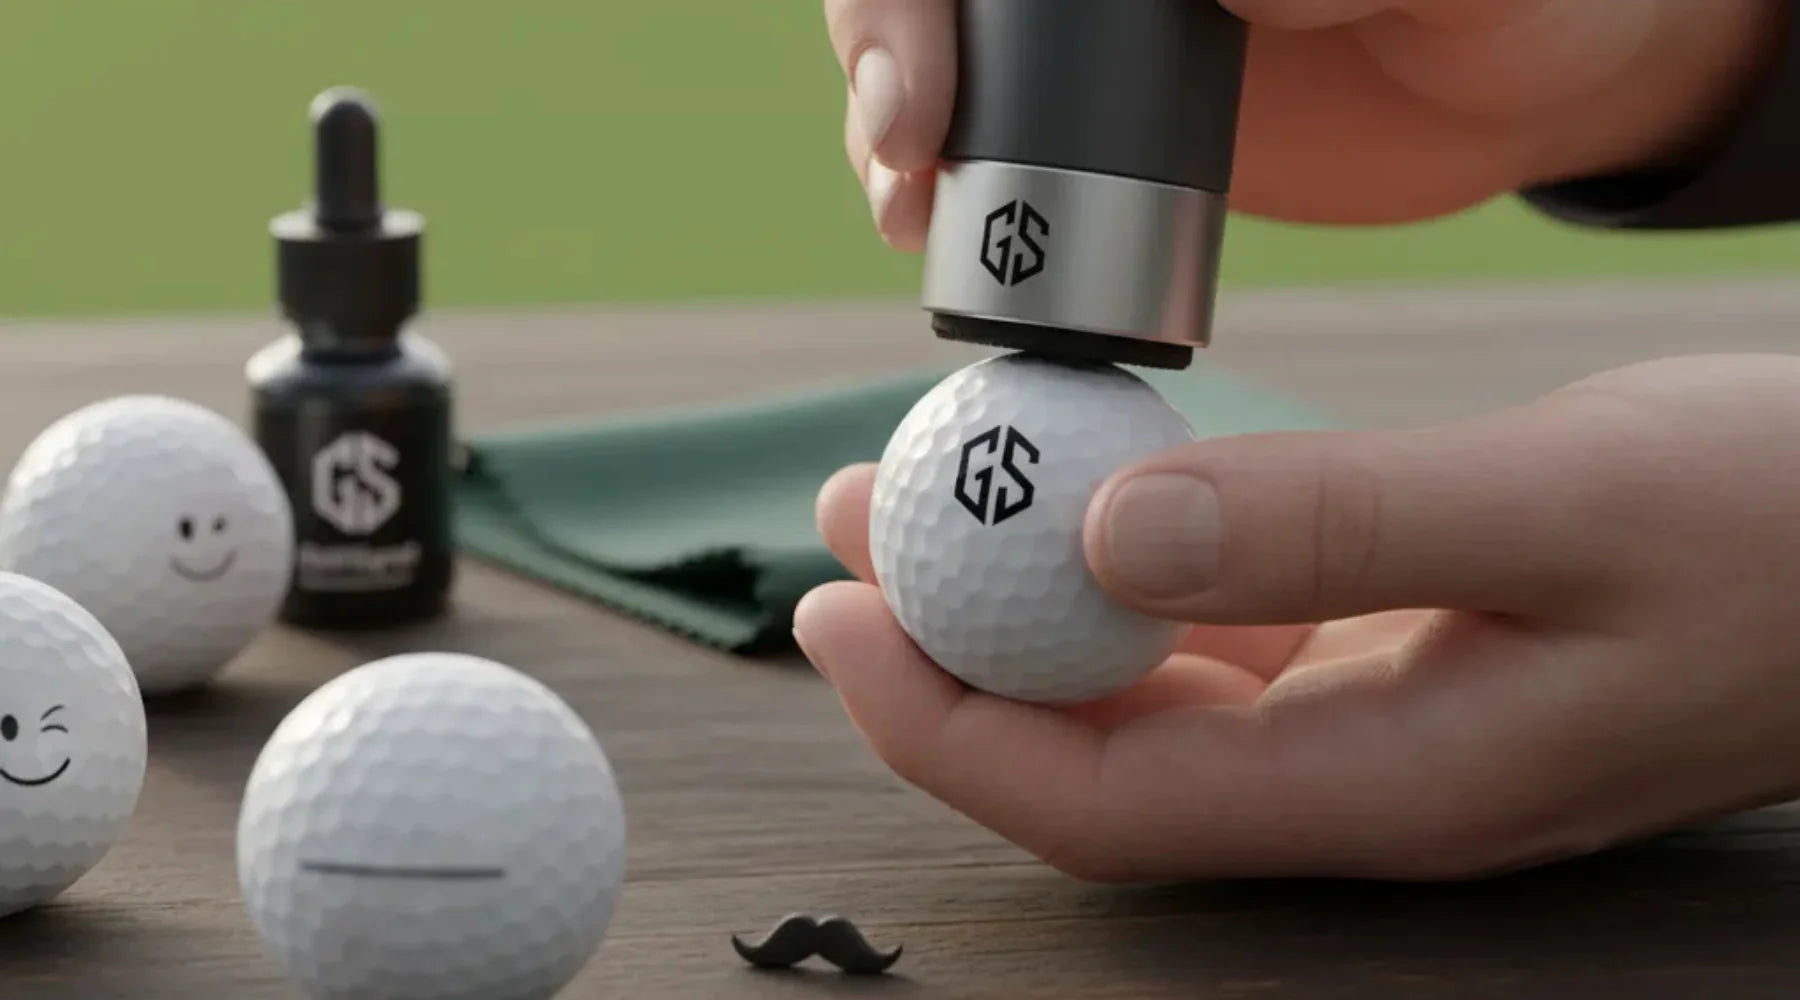
Step 2: The "Rocking" Motion Technique
This is the secret sauce. A golf ball is round; your stamp surface is flat (or slightly flexible). If you press straight down and pull straight up, you will only make contact with the very center of the design, leaving the edges faded or invisible.
To get a full, crisp image, you must embrace the "Rocking" Motion:
-
Position: Hold the golf ball firmly in one hand. Hold the stamp in your dominant hand.
-
Align: Hover the stamp over the desired spot (many players prefer stamping near the alignment line or the number).
-
Press: Apply moderate pressure straight down to engage the center of the design.
-
Rock: While maintaining pressure, gently "rock" or roll the stamp handle slightly in a circular motion—forward, backward, left, and right. Imagine you are trying to massage the edges of the rubber die into the curve of the ball.
-
Release: Lift the stamp straight up.
Pro Tip: Do not slide the stamp. The movement should be a pivot, not a smear. Practice on an old practice ball first to get a feel for how much pressure is required to get the ink into the dimples.

Step 3: Drying Time and Curing
Modern golf stamp ink is formulated to be quick-drying and permanent, but patience is a virtue.
-
Immediate Touch: While it may look dry instantly, the ink in the deeper recesses of the dimples might still be wet.
-
The Wait: We recommend letting the ball sit for at least 30 to 60 seconds before touching the stamped area.
-
Curing: For maximum durability against wet grass and high-impact drives, stamp your balls the night before your round. This allows the ink to fully cure and bond with the ball's clear coat.

Maintenance: Golf Stamp Ink Refill Guide
After stamping hundreds of balls, you might notice the impression becoming lighter. This doesn't mean your stamp is broken; it just means it’s thirsty. Knowing how to refill your golf stamp ink is essential for long-term use.
When to Refill
-
The black (or colored) imprint looks grey or faded.
-
You have to press uncomfortably hard to get ink transfer.
-
Parts of the solid areas in your logo appear patchy.
How to Refill
-
Remove the Cap: Take off the bottom cover of your GolfSignet stamp.
-
Identify the Ink Surface: Look at the rubber die (the part with your design).
-
Apply Ink: Depending on your specific model, you will either drop ink into a reservoir hole at the top (flash foam stamps) or apply a few drops directly onto the face of the design (pre-inked stamps).
-
Direct Application: If applying to the face, put 2-3 small drops of our specialized refill ink directly onto the logo. Let it absorb for 15 minutes.
-
-
Wipe Excess: Gently wipe away any excess surface ink with a paper towel.
-
Test: Stamp on a piece of paper a few times to distribute the fresh ink evenly before moving back to your golf balls.
Warning: Only use oil-based ink designed for golf balls. Standard water-based office stamp ink will wash off in the dew and smear instantly.

Inspiration Gallery: Show Us Your Stamp!
A golf ball stamp is a reflection of your personality. Here are some of the most popular ways we’ve seen our community use their stamps:
The Professional
Simple initials or a clean corporate logo. These golfers use the stamp for easy identification and a touch of class. It looks like the ball came from the factory just for them.
The Joker
Face emojis, mustache icons, or witty phrases like "Hit Me" or "Water Hazard." These are great conversation starters on the first tee and help lighten the mood when a shot goes astray.
The Aim Assistant
Many players order a stamp that features a long, straight line or an arrow. By stamping this 360 degrees (or partially) around the ball, they create a custom alignment aid for putting, bypassing the need for plastic tracing tools and Sharpies.

Frequently Asked Questions (FAQ)
Q: Will the ink affect the flight of the ball?
A: No. The layer of ink is microscopic and weighs virtually nothing. It does not fill the dimples enough to alter the aerodynamics or the ball flight characteristics.
Q: How long does the stamp last?
A: A single refill can typically last for hundreds of impressions. The stamp body itself, if cared for, can last for years.
Q: Can I use this on yellow or matte finish balls?
A: Yes! Our ink adheres excellently to matte finish balls. For yellow or high-vis balls, we recommend using black or blue ink for the highest contrast, as red or green might not show up as vividly.
Conclusion
Mastering how to use a golf ball stamp is a quick learning process that pays off every time you tee up. By ensuring your ball is clean, using the "rocking" technique, and keeping your stamp well-inked, you ensure that your mark is as permanent and resilient as your love for the game.
Ready to make your mark? Grab your GolfSignet stamp, a fresh sleeve of balls, and start customizing today. If you need a golf stamp ink refill or want to design a new stamp for a friend, visit our shop to keep your gear fresh.
Note: Always recap your stamp immediately after use to prevent the ink pad from drying out.
Share:
Top 10 Personalized Golf Gifts for the Golfer Who Has Everything (2025 Edition)
Top 10 Personalized Golf Gifts for the Golfer Who Has Everything (2025 Edition)